Majority design interiors unites one drawback - lack of warmth and home comfort... Of course, over time new interior it will take on a habitable look and pleasant little things for the owners will appear in it, but only handmade decor can become a real decoration.
In this article, we will tell you how to make a panel on a wall made of wood, and describe two methods of making it, and you can already choose which option is closer and more pleasant to you.
Two different wall panels

Wall panels are a decorative element designed to create thematic and semantic accents in the interior. Sometimes even the smallest panel can say more about its owner than a carefully crafted design.
You can make a panel from any available materials: paper, glass (see Glass panels on the wall: how to make and hang them correctly) and even pieces of wallpaper. The soul invested in the product is much more important, and of course, the sense of style. In fact, there are no restrictions on the appearance of the panel, but we will tell you about two ways how you can make them yourself and not infringe on the family budget.
All the wooden panels on the wall presented below will not require any specific knowledge and skills from you, moreover, you will not even need an ingenious set of tools. You will probably find everything you need at home, and even if not, then in a hardware store the price will be no more than a hundred rubles. So let's start in order.

A very original and stylish wood panel on the wall, which can be made in just a few hours.
To make it, we need the following set of tools:
- Hacksaw... It is advisable to use a hacksaw with a blade for metal work. It has smaller teeth and, accordingly, there will be no video chipping.
- Miter box... A tool that allows you to cut workpieces at an angle of 45 degrees. We will need it to make a frame or baguette.
- Hot melt glue gun. By the way, you can do without it if you use not thermal glue, but simple PVA.
- Brushes for varnish or paint... It is advisable to take more expensive brushes, since hairs do not come out of them during work, and you do not have to choose them, then carefully choose.
Well, that's basically all. Although you can also include a drill or a perforator in this list, we will need them not for making the panel, but for mounting it on the wall.
Now that we have figured out the tool, it's time to prepare the materials we need, and here we have a full flight of imagination:
- Branches of different thickness. It is important that the branches are as diverse as possible. Originality and originality will directly depend on this. appearance our panel.
- As a basis for our panel, we need a sheet of thick cardboard or chipboard. It doesn't really matter what the backing is made of, as it will be completely hidden under the decorative layer.
- Wooden slats with decorative carvings or baguette. We will need them to make the frame. If you have any ideas on how to make it, feel free to use it. Originality is very interesting.
Advice! If you use a chipboard sheet as a substrate, and PVA as an adhesive, use the side of the sheet that does not have a glossy finish. This will set the glue much better, and decorative elements will not slide off the base.
So, first of all we need to make a frame. What size is your wooden panel on the wall does not matter at all. It all depends on personal preference.
The miter box will help to cut the corner exactly. We just put a rail in it and use a hacksaw to cut it along the tool stops. Thanks to the miter box, the corners will be even, and the diagonal of the frame will be accurate.
Now we lay out the frame face down, and apply glue to the joints. It will dry out for a rather long time, and at the same time, the parts will have to be constantly held, so it is more convenient to use hot melt glue, which hardens in just a few minutes after application.


When the frame is dry, attach the backing to it from the inside. This can be done with a construction stapler or small nails.
The base is ready, and it's time to tackle the essentials. And first of all, we need to cut the dimes from the branches different sizes... It is unnecessary to strictly observe the thickness of the heel, the more varied they are, the more natural the panel will look.
First of all, we place the largest dimes on the canvas. They should not stand close to each other, it is advisable to place them in different parts canvases. Now we take the smaller dimes, and place them just as randomly. Last but not least, there are the smallest cuts, which completely fill all the voids on our canvas.
Look at the work of your hands from the side. All good? Then you can start gluing them. We carefully take each patch and put glue on it, after which we return it to its place.
After all the elements are glued, it remains only to wait for the glue to dry, and as an additional decoration, you can apply a layer of transparent varnish to the entire composition, which will emphasize all the nuances of the wood and make the picture glossy and shiny. That's all, our panel is ready, it remains to hang it on the wall and enjoy the result, and in the meantime we move on to the next, no less interesting option.
Panel-ikebana

Ikebana is the Japanese art of creating artistic compositions from various plants. Strictly speaking, our panel cannot be called ikebana, since it implies a three-dimensional composition, and a wall panel is a two-dimensional composition. But this is not so important, the main thing is that we will use tree branches as materials, and such a work looks very original.
So, we need a frame or a baguette. We have already described its production in the previous section, there will be nothing new here.
Any material can be used as a basis, and it can be colored to give a certain style. We will not give any advice on this, as well as on the placement of branches in the composition.
It all depends entirely on your imagination, but there are some general tips and tricks that must be followed when making such a wooden panel on the wall:
- Be sure to cover the branches with paint or varnish.... So they will last much longer, and most importantly, they will not lose their appearance.
- If you are using barked branches in your composition, be sure to clean the small area where the glue will be applied.... This is necessary in order to ensure reliable adhesion to the surface and so that our work simply does not crumble.
- If you decide to paint the backing, do not use nitro paint for this.... It will quickly lose its color and the panel will peel off. A good option there will be car paint in aerosol cans.
- Shoe nails can be used as fasteners instead of glue.... They are very small in themselves, and when hammered, their caps will not be visible.


Important! Never work with spray paint indoors and without personal protective equipment. It is best to go outside for this work, but if this is not possible, then at least put on a respirator and open all the windows in the house for ventilation.
As you can see, the process is very simple, but it is difficult to describe it in words, so we suggest you watch the video in this article, which shows instructions and a master class on making wall wooden panels.
And in conclusion

In fact, this is only small part what can be made of wood. A panel on a wooden wall can be so diverse that your imagination is not limited by anything. And most importantly, you shouldn't hold it back. The more extravagant your work is, the better, the more soul you will feel in it, and this is the most important thing for any work of art.
By the way, do not forget to involve your child in this process. This will not only give you the opportunity to spend time together, but will also help the baby to better feel the process of the birth of a work of art, and who knows, maybe one day he will become a famous artist, and it was you who planted his path.
Any wall decoration after renovation is boring, you want to change something and find a way to show your imagination, talent and creative skills.
A three-dimensional panel made of scrap materials is one of the fashion trends in 2017 design.

Looking at the spectacular artwork in the illustrations, it may seem difficult. But if at school labor lessons, figurines from plasticine and salt dough turned out to be excellent, there is experience of working with beads or natural materials - everything will work out.

What material to choose for wall decoration
Panel on the wall handmade- a special decor capable of enlivening the most ordinary setting, introducing a new design concept and enlivening the atmosphere.

The choice of material and technique for implementing an idea depends on many factors:
- Room functionality;
- Wall decoration;
- Creative inclinations;
- Tastes and preferences;
- Availability of materials and tools;
- Skills in working with materials (sewing, knitting, modeling, weaving, drawing).
It is better to place a large panel on the entire wall in a large room, where there is a lot of empty space. The easiest way to buy a painting or to stick a wallpaper is. But there is nothing original in this, plus high costs, and the new object will soon get bored.

Another thing is your own "masterpiece", which you can proudly demonstrate to all visitors at home.

Looking at a unique work, friends and relatives will be interested in how to make such a panel with their own hands?

First, it is better to choose a free wall, and then decide what it will be - a collage from a photo, a drawing, modeling or a mosaic from broken tiles. The general concept and plot of the image should correspond to the functionality of the room and the practicality of care.

For example, it is easy to independently paint aquarium fish on the wall of the bathroom on a smoothly painted wall, but the paint should be durable and indelible.

If the material is susceptible to destruction or dust accumulation, it is better to cover the finished product with a colorless varnish, like a photo panel made of salt dough.
The basis of the paint for the panel must match the material of the wall cladding. For example, if it is acrylic enamel, then acrylic paints are also suitable for wall painting.

The walls in the nursery can be decorated with a wallpaper panel, which is easy to build with the child from the leftovers roll materials left over after renovation.

Tip: Give kids some of the fun process of making homemade décor. They will willingly join the creative process. This will help the development of fine motor skills of fingers and spatial thinking.

Children can collect natural materials- beautiful twigs, leaves and cones for panels. If they don't know how to draw, instruct your child to spray paint from a spray can on a stencil.

They will enthusiastically circle large Maple leaves on cardboard, cut out their outlines to spray on the walls in the hallway with a contour drawing in gold and silver paint. Spray paints and stencils in the decor of any room - The best decision for those who cannot draw.
Panel from edible products for the kitchen
The kitchen is a fiefdom of products, where many bulk materials are suitable for decoration. Before making a panel with your own hands, make an audit in your lockers.
Note!


At the disposal of novice decorators, a whole natural palette that retains its natural color for years. A panel of coffee, cereals and spices will decorate a free fragment of the wall in the dining area.

The work is carried out in several stages:
- Choose the sample you like.
- Make a sketch with your corrections and mark with squares to enlarge the drawing on the wall when enlarged.
- Apply the markings and outlines of the panel with a simple pencil.
- Handle decorative fragments with glue for a specific product.
- The finished areas should dry naturally, after which you can move on to the neighboring elements until the whole picture is finished.

Tip: To avoid disagreements, it is recommended to agree on the plot of the panel with all family members.

Any "appetizing" materials are suitable for the kitchen:
- dried drunk tea leaves are the black and brown outlines of any pattern or soil in the picture;
- semolina is an excellent light base that can be additionally painted, it is also filled in empty areas;
- coffee beans (green and roasted) are excellent material in brown and green tones;
- white and colored rice - a variety of sizes and colors;
- peas, beans, lentils, and beans - white, yellow, orange, reddish, and green fruits different shapes applied to the glue in halves;

- poppy - black base of the picture;
- instant coffee and chicory, cocoa powder and ground cinnamon - a loose base of brown shades;
- pumpkin, watermelon and cucumber seeds are excellent material for do-it-yourself panels, they are also glued in halves;
- chopped or groats of millet, corn and wheat, oat flakes and pearl barley - an inexpensive base different color and textures.
It is advisable to carefully open the finished panel with a colorless varnish in 2-3 layers, so that over time it is easy to clean it from dust.
Note!


The image can be left as if unfinished or limited to a side (frame). Decorating the kitchen together is fun and easy to involve family members from three generations.

Interesting ideas will be suggested by specialists who have recorded a master class on making panels with their own hands:

Those who are good at sculpting figures, small sculptures or making dolls from any material should master the technique of working with salt dough.

For a relief panel, mix fine salt with flour 2: 1, adding a little vegetable oil, water and dry wallpaper glue, kneading like a regular dough. It should be flexible, but firm enough.

The finished mass should not stick to your hands. Small pieces or balls are separated from it, from which the faces of the characters, fruits, leaves and other elements of the panel are decorated. It will hold better if attached to a frame as a portable decor or attached directly to the kitchen wall.
Note!


You can add any other material to complete the plot, such as embroidered fabric, beads, or yarn.

The relief picture dries for about a week, but then a solid durable material is obtained. The finished creation can be decorated and opened with varnish, like a photo of the presented panel.

Expert advice on making panels from various materials
Making decor with your own hands is a fascinating creative process. Usually, after mastering one of the techniques, using the example of decorating dough or cereals for the kitchen, I want to move on to decorating other rooms.

In the children's room, it will be appropriate to decorate from autumn leaves or colored paper panels made of fabric using the patchwork technique.
The needlewoman's bedroom will be decorated with a panel of flowers, leather, fabric or buttons. A popular plot is the money tree, where coins or green coffee can be added to the buttons.

An excellent decoration for a bathroom or a bathroom will be "marine" material - smooth colored pebbles, shells and coral twigs.

The living room will be decorated with cork, bamboo, ornamental stone. In the right hands, any material will become the basis for a homemade masterpiece.

DIY photo panels


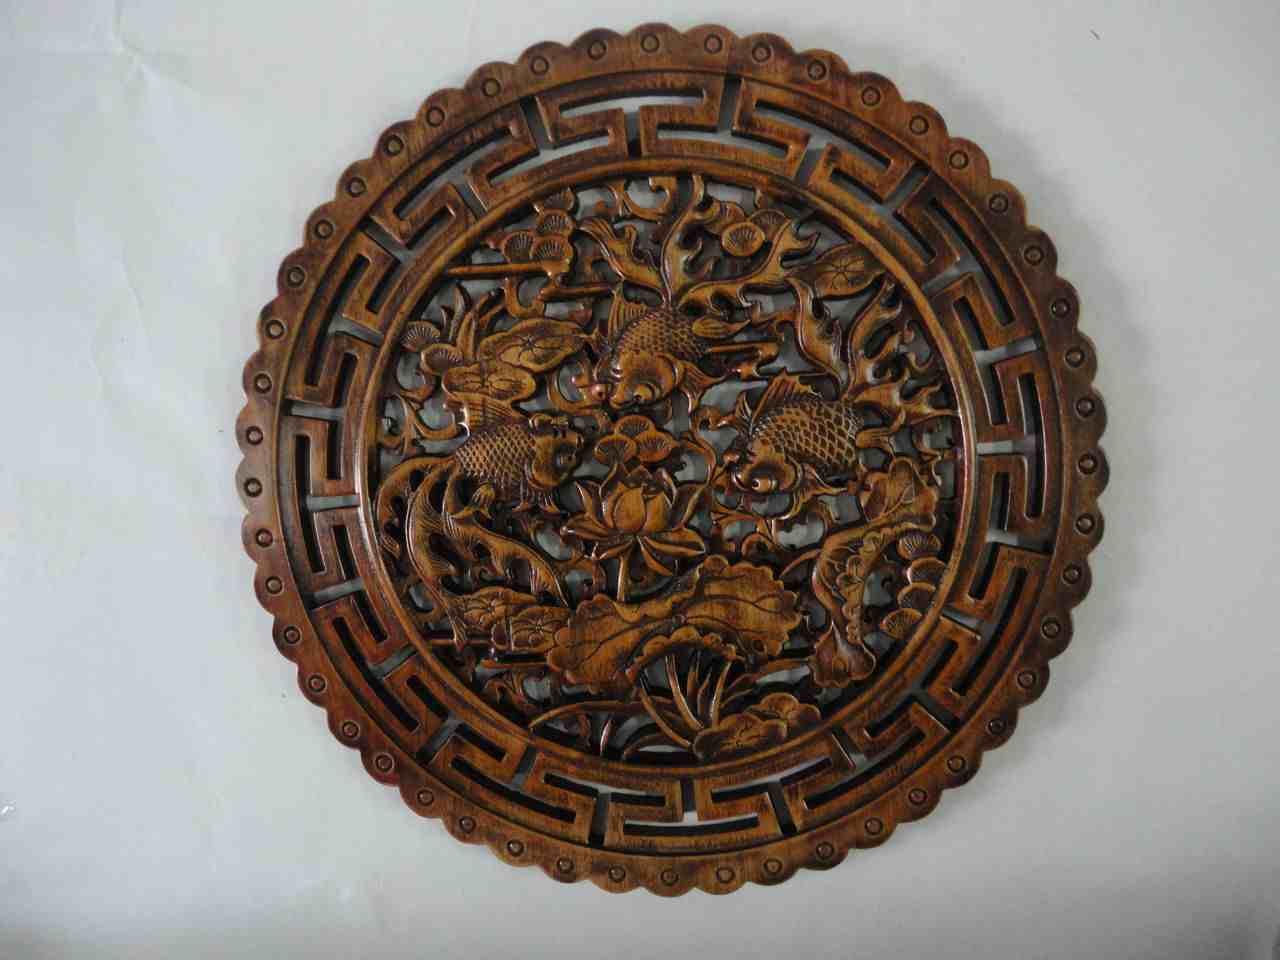
Such products are gaining popularity every year, since it is with their help that you can create the most comfortable, elegant and original design. It is worth noting that if a wood panel is made using all technologies, then it can be safely purchased for any interior and regardless of the purpose of the room. For example, it can be hung in the hallway, living room and even in a bath. Modern designers often use exclusive carved wooden panels to decorate offices and halls.
Wood carvings are considered one of the most popular indoor decorations. By cutting a pattern on a wooden plate, craftsmen create the most beautiful volumetric images.

In order to make a high-quality craft, you will need to use only durable and noble wood species.
For example:
- Pine;
- Birch;
- Alder.
In the old days, such carved paintings from teak or pine were made exclusively with their own hands, and they only depicted pictures from life, as well as images of animals and plants.
A good option is the painting of a wooden panel with the help of ornate painting or a variety of ornaments, in which rocks of different shades are used.

Often, amber and silver are used to decorate carved panels. It is worth noting that the creation of such a product as carved wood panels for a bathhouse and at home is not just a hobby, but a whole art that requires skill, talent and, most importantly, a soul that is invested in the work.
Wooden panel from a saw cut from a tree
If it is not possible to buy or create a carved wood panel, then you can choose wall paintings created on a cut of trees and branches as a decor.
It is much easier and faster to create such paintings on your own, and for work you will need to use a sheet of plywood and a frame in the form of wooden branches.
The sizes of such paintings can be very different, from the smallest to the largest.

It all depends on the taste and preference of the customer, or on your own wishes. For example, if there is an opportunity, then it is quite possible to make a carved panel-clock that is suitable for the hallway and for the kitchen and will delight you with the fact that this is a hand-made product.
Panel made of saw cut wood in the interior of the apartment (video)
Carved wooden panels made of wood in the interior
Working with wood and creating a variety of products from it is not so easy, since you need skills, artistic taste, the ability to correctly emphasize the side and texture of the material, and also create a real masterpiece from it. A carved panel is a picture with a finished image that can be brought into any home and room. Previously, it would seem too easy to use wooden paintings for the interior, but now they are so popular that they can even be found in the design of enterprises and companies.
Naturally, it is worth considering the fact that if a carved panel is used in the design of the room, then the rest of the design should be appropriate.
Some of those who prefer to decorate their home with wooden products order many paintings at once and the corresponding decoration of the house.

If you combine interior items such as massive wooden table, paintings from a carved panel and all this is supplemented with pleasant warm lighting, this will be the most attractive solution for creating a beautiful composition.
Esotericists believe that using wood products, especially handmade ones, it is possible to create not just a lively atmosphere, but to fill it with positive energy, comfort and an aura of creativity.
How a carved wood panel is made
The technology for making a carved wooden panel is not as simple as it seems, respectively, those who wish to immerse themselves in such activities should fully study in order to avoid oversight.

What should be done:
- Initially, it is worth choosing the necessary picture, according to which the layout will be created, or in other words, the image is detailed using the marquetry technique, in which every detail of the picture must be marked with its own specific shade.
- After that, you need to pick up veneer and wood. The tracing paper on which the sketch is applied is fixed on the veneer, which will become the basis of the canvas with the selected composition.
- The overall background is created using details of various kinds and the type of wood to which the layout of the picture is transferred.
- With the help of a knife, you need to cut out every detail in order to exclude cracks, chips and notches, and also the selection of veneer species is carried out according to shades and the corresponding details of the future picture.
It is worth noting that the details should be cut larger than they really should be. After that, all the elements of the future panel are placed for firing in heated sand or salt, where they are saturated with color and its specific depth.
A selection of parts for the required dimensions is carried out, and each edge of the veneer is coated with contact glue and a complete picture is assembled.

In order to make a volumetric carved image, you will need to use a special cutter, which is used on the finished wooden canvas. At the end of the work, the picture is covered with varnish or special paint on wood.
How to decorate rooms with a carved wood panel
A carved panel, as well as a three-dimensional painting made of wood or glued veneer, is a great way to create an individual style in the decor of a room. It can become a worthy painting in the living room or office, including in the bedroom, dining room and country houses.

Housewives who prefer to spend most of their time in the kitchen will be able to appreciate such elements as wood panels, since only with them can you achieve the very coziness and comfort. If you add carved wooden stools, benches or a huge round family table with handcrafted legs to the room, then this will become the most attractive place in the house.
Modern carved wood panels allow even such banal rooms as baths to be made the most unusual and creative, as they cheer up and create a special atmosphere in which everyone will be pleased.
The panel for the bathhouse is made of solid wood species, and therefore they are not afraid of moisture and high temperatures.
3D wood panel (video)
A carved wood panel is a modern unique decoration that can be made to order and according to your preference. It is important to note that a wooden panel will last for many years and will delight many generations of the family in which it will be acquired with its appearance.
Examples of carved wood panels (photo in the interior)


The best option is a decorative panel made of wood (MDF) on the wall. The panel can also be used for installation in a Niche, or for framing the Portal.
Carved ornaments are made on milling machines CNC of the latest generation, with the highest precision, which is very important when installing.
The maximum dimensions of the Panel (without gluing) are 2000x2800 mm. It is possible to achieve any size by splicing.
- This version of the carved panel is made without a frame, one-sided painting, enamel.
- Lattice thickness (with ornament) 10 mm.
- Color: enamels of any shades according to the RAL palette (more than 200 colors) by Sayerlack (Italy)
- Supplied packed.
Decorative MDF Panels have a number of advantages:
- environmentally friendly
- large palette of colors
- optimal price / quality ratio
- good strength characteristics
- wear resistance
What is the difference between the materials used?
MDF- environmentally friendly, very durable material, consists of wood chips and paper fibers.
MDF is suitable for 3D volumetric and planar milling. It can be painted with enamel in any color.
MDF veneered- this is mdf faced with a thin cut of rare beautiful wood species. Safe, durable, natural material, resistant to deformation. You can do color toning - giving any color and shade.
MDF laminate- this is mdf faced with wear-resistant decorative material. Optimal price / quality ratio! Color - White white milky and wood grain (light and dark tones).
Plywood- environmentally friendly, moisture resistant material, made by stacking several layers of veneer, this gives high strength and dimensional stability. Toning in any color, volumetric and flat milling.
Pvc- foamed plastic, moisture and frost resistant, very elastic and easy to process. The color is bright white. We can paint your product in the color you need. If painting is not needed, the cost of the product will be cheaper.
The color of the product made of MDF under enamel and MDF with natural veneer is to be agreed with the customer when drawing up the model of the product.
We invite you to cooperation
Fine Decor invites wholesalers, architects, designers, decorators and company owners to cooperate on special terms. We know how and can work together with you and for you!
For our partners we have developed special conditions cooperation. Discounts up to 25% Fill out the form and our manager will call you back shortly.
Submit your application
Custom order? We will make you an individual offer!
- Own production in Krasnogorsk
- High quality and reasonable prices
- Turnkey production: from layout to installation
Send a request
Delivery, payment and how we work
You choose the type and design of the product you like on our website or from other sources
Send an Application for calculating the cost: by filling out the Application form on our website, We calculate the cost of manufacturing the Product, taking into account the dimensions and material of your design.
After agreeing on the cost, if necessary, our specialist will go to measure the installation of your product. We will send you a contract for the manufacture of products.
Payment under the Agreement is accepted by transfer to the company's current account. After payment, the product is put into production.