Electricity is a rather expensive source, whose environmental safety is questionable. This is due to the fact that hydrocarbons are used to produce electricity. These processes not only consume mineral resources, but also poison environment. It is possible to provide the premises with wind energy. Such installations are not cheap, but you can make a wind generator from an engine washing machine with your own hands.
Such devices are not often used as the main sources of electricity, but as additional ones they are quite optimal. This is an ideal option for a summer residence, country houses, which are located in places where power outages often occur. Homemade design from the engine washing machine or a screwdriver will be very cheap and will help save significant amounts on energy costs.
This perfect solution for thrifty owners who do not want to overpay and are willing to work hard to reduce costs. The classic design includes mechanical devices, the main purpose of which is to convert the kinetic energy of the wind into mechanical, and then into electrical. The bulk modern models equipped with three blades. This is necessary to increase the coefficient useful action. They begin to function at a wind speed of 2−3 m/s.
Wind speed - the most important indicator, because the performance of the unit depends on it. Technical documents for industrial wind turbines always indicate the indicators at which the product operates with maximum efficiency parameters. In most cases, this value is 9−10 m/s.
There are also maximum permissible wind speeds. They vary between 23−25 m/s. With such indicators, the efficiency of the wind generator is significantly reduced, because the blades of the unit change position. If we talk about a self-made installation, it is extremely difficult to calculate the technical characteristics.

It is necessary to focus on average values, and then calculate the required amount of electricity for basic needs.
Unit profitability
Installation of a wind generator is justified if the wind speed exceeds 4 m/s. In a situation like this almost all needs can be met:
- A product with a productivity of 0.15−0.2 kW will be able to convert indoor lighting to environmentally friendly energy. In addition, it will be possible to connect a TV or PC.
- A design with a power of 1-5 kW will be able to ensure the operation of appliances, including a washing machine and refrigerator.
- To operate all systems and equipment on environmentally friendly energy, including heating, you will need a unit with a capacity of 20 kW.

When making a wind generator from a washing machine with your own hands, you should take into account the instability of wind speed.
Electricity can disappear at any moment, so household appliances should not be connected directly to the device. This requires batteries and a charge control device, since electrical equipment requires a voltage of 220 V.
To make the unit yourself, you will need to buy several parts. Many of them can probably be found in old household appliances, but some will need to be purchased. Essential elements:

If you purchase a ready-made station, you will need to pay 70-80 thousand rubles along with installation. A homemade wind generator will cost no more than 3.5-4 thousand rubles.
The difference in cost is significant, so it is quite advisable to make and install the structure on your own. The result will be a unit with a power rating of about 2.5 kW. This is quite enough to function household appliances.
Operating principle and product types
All wind generators are different, regardless of whether they are industrial or homemade. Their classification is carried out on several grounds:

When producing a windmill yourself, you first need to decide on the design. In addition, it is necessary to calculate the required power taking into account operating conditions.
Horizontal structures are more preferable because their production does not require high-precision calculations. A windmill like this is much easier to make; it starts working even in light winds. The disadvantage is the bulkiness of the product and noise during operation.
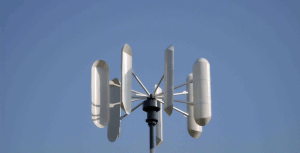
 A vertical unit is suitable for those who have the time to assemble and install a complex but compact system. A windmill operates by the movement of blades that are attached to a rotor. The latter is fixed to the generator shaft, generating a flow of electricity. Next, the energy is supplied to battery devices, where it is accumulated, and then powers household appliances.
Advantages and disadvantages
Wind turbines have been popular for a very long time. Designs are constantly being improved, and wind is easily accessible energy source. Devices powered by it are environmentally safe and convenient, because they are placed on masts without occupying usable space. The units are easy to maintain and repair.
Structures make sound during operation. The noise can be loud or quieter, but it is always there. Often this aspect bothers home owners and neighbors. There are other disadvantages as well.
Wind is an extremely unpredictable element. Because of this, the generator’s activity is unstable, so it is necessary to accumulate energy so that in calm weather you will not be left without electricity.
Manufacturing instructions
To produce a wind generator, you will need a 1.5 kW washing machine motor. Besides, you will need:
- neodymium magnets measuring 0.5−1.2 cm - 32 pcs.;
- sandpaper;
- epoxy resin;
- glue.
 Magnets can be purchased in online stores or retail chains. They need to be installed on the rotor. It is necessary to remove the cores from the latter or cut off part of them into lathe. Then grooves with a depth of 5 mm are made in them.
When the structure is ready, it is necessary to install the magnets in the designated places. The first step is to make a tin covering for the core, and then install the magnets at the same distance from each other. It is important to maintain the distance, otherwise the magnets will stick together during operation, and the performance of the device will significantly decrease.
The finished magnetic template is placed on the rotor, and the gaps are filled with epoxy resin. When the procedure is completed, you should clamp the rotor in a vice and carefully sand the surface with sandpaper. After this, the condition of the bolts should be checked on the bearing and housing. If the elements are worn out, it is recommended to replace them.
Functionality check
To check the operation of the assembled wind generator, you will need additional instruments. Among them:
- rectifier;
- tester;
- battery;
- controller.
First of all, you need to determine which wires come from the working winding and remove all the rest.
These conductors must be connected to a rectifier. The latter is connected to the controller, which is connected to the battery. The system is ready for testing.
 The power of the windmill is checked as follows: a voltmeter is brought to the battery, and the assembled unit is spun a regular drill or a screwdriver. It should be noted that the speed of the latter must be at least 800 rpm, the optimal option is 1000. Normal values are considered to be 200-300 V.
When assembling a wind generator from a washing machine, difficulties may arise with the manufacture of the impeller. You need to choose a light but at the same time durable material. A good solution is fiberglass blades. They are light in weight, but very reliable and wear-resistant. For the mast, steel pipes with a diameter of 32 mm are sufficient.
Installation process
The first step is to choose a suitable location for the wind generator. It is advisable to install the support in an open area; the top of a hill is best suited for this. Many experienced craftsmen believe that the higher supporting structure, all the better. Step by step steps:

To protect the wind generator from various weather conditions, you can make a canopy over it. Such designs significantly increase the service life of the product.
Experts do not advise immediately connecting expensive and powerful household appliances to the windmill. First you need to test the design on a phone charger or other simple devices.

A wind generator is the best option as an alternative energy source, but it can also become the main one for small buildings or country houses. A homemade device will work for more than one year. In addition, a home-made product will significantly save family budget. The main thing is to carefully study the information and not be afraid of experiments.
If you decide to make a mini windmill with your own hands, then an important issue will be choosing a suitable generator. One of best options will be used during the refurbishment process asynchronous motor. This type of engine is widespread and is used, including in conventional washing machines. So if you have a working engine from an old washing machine, then it’s quite possible to convert it into a generator for your mini power plant.
In order to assemble a wind generator from a washing machine, you will need to purchase magnets (preferably neodymium). Their purchase will be one of the main expense items in the implementation of this project.
To install these magnets, you need to remake the motor rotor. To do this, use a lathe to make recesses for the magnets. Then you need to make a template that will help you place the magnets correctly. It is advisable to apply marks to the magnets themselves, which will facilitate their correct placement.
After these preliminary steps, you can begin attaching the magnets. One of the most simple options is to simply glue them with “Superglue”.
After the magnets are glued, you need to wrap the rotor in paper and fill the cavities between the magnets with epoxy resin. After the resin has dried, it is necessary to remove the shell and sand the rotor with sandpaper. The main problem with such generators is sticking. To avoid this, it is best to install magnets with a slight bevel.
The generator is ready. Now, to complete the windmill, you need to make a rotating part from the washing machine engine. There are many materials from which blades can be made, but there are only two options for their placement: horizontal (which is classic) and vertical (which appeared not so long ago). The specific option must be selected based on your needs, but for small windmills, which undoubtedly includes a wind generator from a washing machine engine, vertical placement is still better suited, since the coefficient effective use air flows with such placement are higher. After attaching the moving part, all that remains is to install the windmill and connect it to the batteries.
Today, the idea of using alternative energy sources that make it possible to provide users with electricity in hard to reach places. The impetus for the construction of generators was the spread of neodymium magnets, which have modest dimensions and weight, but provide a stable and powerful magnetic field. To harness the power of the wind, it is possible to make a wind generator with your own hands from scrap materials.
[Hide]
The principle of operation of a wind turbine
The operation of a wind generator is based on generating electric current by rotating a wheel with several blades under the force of wind pressure.
Rotation occurs at low speeds and is transmitted to the gears of the overdrive gearbox. A generator is installed on the output shaft, which generates electricity.
The design has a control controller that regulates the parameters of generation and distribution of electricity. Low-power home-made installations do not have a control system.
Types of wind turbines
- The operating principle of the devices differs depending on the types of installations, which are:
- Winged, which have a horizontal design and are driven by a wheel with several blades (propeller). The propeller is equipped with one, two or several blades, which have a rigid or sail design. Sailing products are inexpensive, but are not durable. On large installations, it is possible to rotate the blades, which increases the efficiency of the installation.
- Drum-type, with a vertical arrangement of the axes of the working units.
The schematic drawing shows a sample of a wind turbine generator built on the basis of a bicycle generator (in diagram G1).
Wind generator
Advantages and disadvantages
The main advantages of the installations are:
- environmental friendliness and the ability to work without burning fuel;
- use of a renewable (in fact, inexhaustible) source of energy for operation;
- ease of maintenance.
TO negative traits include:
- unstable power characteristics that depend on wind strength;
- the need to accumulate excess electricity (typical for large-sized installations);
- noise during operation (the problem concerns generators with large wheel diameters);
- high price.
The general principles of operation of an autonomous wind generator are outlined in a video from the author Darkhan Dogalakov.
Before purchasing a unit or trying to assemble it yourself, you should evaluate the economic effect of its use.
In addition, before installing the wind generator, it is recommended to carry out an aerial survey of the installation site.
There are three zones on the wind speed map, each of which has its own types of installations:
- For wind zones with speeds less than 3 m/s, the use of devices with sail impellers is recommended. These installations are capable of operating in low wind conditions and providing power up to 2-3 kW.
- With winds up to 5 m/s, it is possible to use factory installations or homemade vertical structures.
- In areas with wind speeds of more than 5 m/s, the use of any installation is justified. It all depends on the budget and the required power.
Wind speed map
What you will need
Various components from household appliances and cars can be used as the starting base for constructing devices. Some tools and materials required during the work process may vary depending on the base of the device.
To create from a washing machine
To complete the work of creating a wind generator from a washing machine you will need:
- electric motor from a washing machine with a power of 1.4-1.6 kW;
- 32 neodymium magnets with a diameter of 10-12 mm;
- sandpaper;
- epoxy resin or cold welding;
- screwdriver;
- current rectifier;
- tester.
To create from an asynchronous motor
To make a device from an asynchronous motor for a private home, you may need:
- steel water pipe with an outer diameter of 70-80 mm for building a mast;
- material for the impeller blades (aluminum tube, thin wooden boards, fiberglass) or ready-made factory-made blades;
- materials for making the foundation (boards, pipe or profile cuttings, cement mortar);
- steel rope;
- thin sheet metal or moisture-resistant plywood for the shank;
- asynchronous motor (the most popular models are AIR80 or AIR71);
- additional neodymium magnets.
To create from plastic bottles
To make a small wind generator based on plastic bottles, you do not need expensive materials.
Materials and tools for assembling a wind generator from plastic bottles:
- steel or chrome-plated tube with a diameter of 25 mm and a wall thickness of up to 1.0 mm with a total length of 3000 mm;
- cylindrical plastic bottles with a volume of 1.5 liters - 16 pieces (when using bottles of a larger volume, you may have to recalculate the dimensions of the shaft);
- bottle caps in the amount of 16 units;
- ball bearings No. 205 (other series with a shaft hole diameter of 25 mm are also suitable);
- a pair of 6/4″ clamps (used as bearing housings);
- two 3/4″ clamps that will serve as mounting points for the wind generator;
- additional clamp for installing the generator (in the example below, a product with a size of 3.5" is used);
- nine M4*35 size screws with M4 nuts;
- 32 M5 washers for installing covers;
- rubber tube with an internal diameter of 25 mm (segment 150-200 mm);
- bushing with an outer diameter of 25 mm and an internal hole of 9-10 mm;
- stepper motor with power up to 10 W;
- bicycle generator;
- lantern with dynamo;
- drill or screwdriver;
- hacksaw for metal;
- drills for making holes in metal pipe diameter 4 and 8 mm;
- screwdriver with Phillips and flat blade;
- wrench 7 mm.
To create from an electric motor
Necessary materials:
- generator from a car;
- working 12 V battery;
- inverter with a power of at least 1 kW for conversion direct current with a voltage of 12 Volts to alternating 220 Volts;
- 200 liter barrel for making blades;
- 12 V light bulb for control;
- switch and voltmeter;
- copper wiring with wire cross-section from 2.5 mm²;
- a pipe with a diameter of about 45-50 mm for the axle;
- pipes with a diameter of 100 mm or more for building a mast;
- bearings;
- welding machine;
- cement mortar;
- guy cables with a diameter of 6 mm and anchors for fastening to the ground;
- fasteners (hardware, clamps, etc.).
Tools:
- roulette;
- pencil and metal scriber;
- set of wrenches;
- drill or screwdriver;
- container for mixing the solution;
- metal drills;
- grinder and several spare circles;
- metal scissors;
- files and sandpaper.
How to make a wind generator with your own hands
An example would be an axial generator with a stator without metal frame, using a hub and brake disc from a passenger car as a rotor:
- Clean the hub and disc from corrosion products and brake pads.
- Paint the outer surface with paint that protects the metal from further corrosion.
- Check the condition of the bearings; the future rotor should rotate easily, without jamming or runout.
- Symmetrically install neodymium magnets on the working surface of the brake disc. For construction, it is recommended to use rectangular or square shape, since they provide a better distribution of the magnetic field. When installing magnets, you should alternate polarity and remember that for a single-phase generator, the number of magnets and stator coils must match. If you plan to assemble a three-phase unit, then the number of magnets and coils should correspond to a proportion of 2/3 or 4/3.
- Fill the installed magnets with epoxy resin.
- For full charge mode car battery a generator with such a rotor must develop at least 125 rpm. In this case, there will be about 1200 turns of wire in the stator winding. Based on this value and the number of magnets, you need to wind the coils yourself. For this purpose, auxiliary equipment can be used, drawings and diagrams of which are distributed on the network. The width of the coils must correspond to the height of the magnets and not exceed it.
- Place the coils on a template made of paper or plywood and pour epoxy resin on top. Before pouring, phase limit switches are displayed from which the voltage will be removed.
- Make a wind wheel using homemade or purchased blades.
- Assemble the generator and install it on a mast 8-12 m high.
In addition to the design described, there are various types homemade installations, some of them will be discussed below. Most solutions are based on electric motors and generators and share common design features.
From the washing machine
An example of creating a generator from a washing machine engine is shown in the video by user kim tools.
Step-by-step instruction:
- Reduce the diameter of the rotor according to the height of the magnets on the lathe.
- Cut twelve grooves with a depth of 5 mm in the core.
- Make a circular template from a thin steel sheet.
- Place magnets in the slots. In this case, it is necessary to remember about alternating polarity.
- Assemble the resulting generator and conduct testing. Before starting the test, you will need to find two wires from the working winding that connect to the rectifier. The remaining leads are isolated and removed inside the stator.
- Spin the generator shaft to 950-1000 rpm. In this mode, the output of the device should be at least 200 Volts.
- After testing, the drive propeller is installed on the generator shaft and the entire structure is mounted on the mast.
From an asynchronous motor
The design of the device has few differences from a generator based on a washing machine motor and provides more power.
The first stage of creating the device will be converting the engine into a generator with a voltage of 220 V and finalizing the design:
- Turn the motor rotor core on a lathe for subsequent installation of magnets. The goal is to reduce the diameter of the core by the height of the magnets and the adhesive layer. Sometimes you can install a special steel sleeve, which is pressed onto the treated rotor. Magnets are attached to the surface of the sleeve, which acts as a magnetic induction amplifier.
- Mark the surface of the machined rotor or sleeve into four poles (the number of poles corresponds to the stator design), which should alternate. The magnets must be placed diagonally, parallel to the grooves. In the case of rewinding the stator and changing the number of poles, the installation scheme of neodymium magnets must also change. They are placed close to each other within one pole, and there is a gap between the poles. The entire structure must be symmetrical and balanced.
- Install the rotor into the stator, check the gaps and the possibility of unhindered rotation. In case of surface contact, the core should be modified by additional grooving.
- Secure the magnets with tape or epoxy resin. After the substance has hardened, re-check the gap between the rotor and stator.
- Carry out a test run of the generator using a drill and a load, which is an incandescent lamp or other consumer of electricity.
- After checking, a drive wheel is installed on the shaft (sail type in the photo above) and the generator is raised onto the mast.
- The mast is installed on concrete base and is additionally fixed with cable braces.
One of the engine-based generator samples
From plastic bottles
A generator of this type can be assembled by yourself at home in a few hours.
In order to make a windmill, you need to follow the instructions step by step:
- Cut two 500 mm pieces from the pipe, which will be used as the axis and base of the cantilever mount.
- Cut two more pieces of 450-500 mm each for the cantilever axle supports.
- Make a blank from a pipe with a length of 150 mm, which will serve as a support for the generator on the console.
- Step back 100 mm from the ends of the shaft blank and mark the attachment points for 8 blades, which will be plastic bottles. The holes are drilled through with a 4 mm drill in a spiral with an offset to the left by 25 mm and through a height distance of 82 mm.
- Make the second row of holes offset by 90 degrees relative to the first.
- At a distance of 100 mm from the ends of the shaft, make two through holes for the bearing fixing pins.
- Drill holes in the center of the plugs with a diameter of 4 mm.
- Install the plugs in pairs using a screw, nut and two washers, which are placed on each cover. Tighten the plug nuts.
- Cut an elliptical part from the side of the bottles (shown in the photo). It is recommended to make the cutouts the same size, using the first bottle as a template.
- Screw a bottle blade into each cap, thus forming a vertical wheel.
- Place 6/4″ clamps on the bearings, which are attached to the consoles.
- Mount the base for the generator on the lower console. Select the attachment point experimentally.
- Install the existing generator into the mounting clamp. The example shown uses a generator flashlight model SB-6020, equipped with a built-in rechargeable battery.
- Connect the generator shaft to the wheel using a rubber hose or bushing.
- Center the electric generator and secure the support to the console.
- Install the generator in a convenient place and check its operation.
The photographs show the main aspects of the construction of a low-power wind generator.
 Shaft blank with bearings installed
  Approximate view of the cutout in the bottle
  Installing Blade Supports
  Generator installation
  Top view of a wind generator made from bottles
  Side view of a bottle wind generator
From a gas generator
At home, it is not possible to create a wind generator based on a generator removed from a gasoline installation.
The difficulty is that a powerful generator is designed to operate at high speeds, which are difficult to achieve using a wind wheel. At low rotor speeds, the self-excitation circuit will not start working and there will be no voltage at the terminals.
From an electric motor
In addition to the designs described above, you can independently assemble a powerful installation from car generator. The circuit uses a 220 V voltage converter, which allows you to connect household appliances to the network.
To build a wind generator with your own hands you will need:
- Mark and cut the barrel into four or more segments. The edges must be processed with a file and sandpaper to remove burrs. It is recommended to coat the finished fan blades with paint, which will protect the metal from corrosion. When cutting, you don’t have to separate the sidewalls from the horizontal surfaces, but rotate them to the required angle.
- Make an axle from a pipe. Its length should be 200-250 mm greater than the height of the barrel.
- Install a cross-shaped guide for the blades on the upper edge of the pipe and secure it by welding.
- Mount a symmetrical guide at a distance equal to the height of the blade.
- Install the blades between the guides, providing for the possibility of adjusting the installation angle. The power of the assembled unit depends on the correctness of the chosen angle.
- Assemble a mast from large-section pipes. The height of the mast is recommended to be at least 7 meters. If there are buildings within a radius of 30 meters, then the height should be increased by several meters. It should be remembered that as the height of the mast increases, the load on the frame increases. Ideally, the lower edge of the wind wheel should be 1 meter higher than adjacent buildings.
- Fill the base of the mast with concrete and strengthen the structure with guy ropes.
- Rewind the generator with a wire 0.55 mm thick. With this thickness, each winding contains 60-65 turns. Magnets are installed on the machined rotor.
- Assemble the device and check its operation.
- Install the generator on the mast and connect it to the vertical wheel.
- Check the operation of the installation in various modes.
Wind generator maintenance and safety measures
When using a wind generator, the following maintenance and safety points should be considered:
- The mast with the installed generator must be grounded. When using factory-made products, lightning damage may result in denial of warranty service.
- When starting, it is prohibited to use the generator as an engine (for accelerated spin-up).
- It is not recommended to operate the units in wind speeds exceeding 5 m/s. This is especially true for factory products.
- Regularly (every 400 hours of operation) you need to add grease to the rotor bearings. After 1200 hours, it is recommended to wash the bearings with kerosene and fill them with new lubricant.
- Inspect and tighten the contact groups and fasteners of the generator. If the commutator sparks, sand it with sandpaper.
- Install battery at a distance of no more than 25 meters from the mast. The battery should be located in a container or room with a temperature of +5ºС. The battery room must be ventilated as explosive gas is released during charging.
- A switch panel must be used to disconnect devices.
Today many are interested alternative sources energy, but things don’t go further than reasoning and ideas, since such sources cost fabulous amounts of money. For example, a 2.5 kW wind generator together with a gearbox and propeller will cost 60 thousand rubles, not counting the installation fee, which is, to put it mildly, a little expensive. But you don’t have to give up the idea due to lack of money; you can make a wind generator with your own hands from parts of a washing machine, and we, in turn, will share with you our experience in making this thing.
Is it necessary to start making a windmill?
Everyone must answer the question whether or not a wind generator is needed for themselves. But if the issue is acute and there is only a dilemma to buy a windmill or make one, we will give you specific numbers. A Chinese-made wind generator assembled “with all the guts” and installation (which is called “turnkey”) will cost you 75,000 rubles, and this is at pre-crisis prices. A wind generator made from a washing machine, made by yourself, will cost an average of 3,500 rubles(may be a little more expensive if there is a “tightness” with scrap metal). As they say, feel the difference.
Of course, it’s not just about money, to “bring to mind” a homemade wind generator, it will take a lot of time, ingenuity and “golden hands”, but overall the result is worth it, because at the end you will get a stable device with a power of 2.5 kW. This is enough to electrify as little as possible. small dacha. In particular, our windmill provides lighting for two rooms country house, operation of a computer and a small portable TV.
For your information! In order for the efficiency of a wind generator to be as high as possible, it is necessary to immediately consider the location of its installation. Perfect option- open place.
We select the necessary spare parts
As already mentioned, if you have a garage full of various metal junk, the cost of making a wind generator from a washing machine engine with your own hands is sharply reduced. The main element that you need to deal with first is the generator. The generating unit is the basis of your homemade windmill, but this is also its most expensive element.
Some “homemade” people offer to make a generator from a washing machine engine. There is a reason for this, but there is also a problem. This engine will have to be redone, namely, equipped with a magnetic rotor. There are two ways: the first is to buy a magnetic rotor, the second is to make it. We suggest not to bother and order a ready-made rotor, why? 
- For a homemade rotor you will need special neodymium magnets, which will have to be ordered anyway. And the price tag for a set of such magnets is the same as for a new Chinese-made magnetic rotor.
- Assembling a homemade magnetic rotor with your own hands is associated with certain problems. You will need to cut out a special shape and stick each magnet very securely - this is a thankless and painstaking job.
- The magnets on the rotor must be positioned at the correct angle, otherwise they will stick and the generator will stop working. It is difficult to calculate this angle, and it is difficult to secure the magnets in this position.
Note! The magnetic rotor for the future generator is the main part of the cost; with shipping it will cost about 2-2.5 thousand rubles.
The 2.5W magazine rotor fits perfectly into the motor of a modern washing machine; there’s no need to do anything special. By the way, you can make not only a windmill from a washing machine engine, but also, for example, but that’s another story. Next you need to get a mast, gearbox, long shaft, gears and impeller. We admit that if certain materials are available, technical solutions may be different, in our case the mast was made like this:
- Several sections of used 32 mm steel pipes were taken and connected to each other, resulting in a single hollow structure 10 m long.
- Next the mast was painted white.
- After this, the mast was ready to be hoisted onto the pole. On it we attached protruding steel brackets from an angle with a hole so that the mast was securely held vertically, at the same time, so that nothing prevented its rotation.
If there is no non-functioning pole nearby, then the problem of supporting the mast will need to be solved, since the pipe structure itself is unstable. Next, we will assemble a gearbox for a wind generator with a vertical axis of rotation, which is shown in the figure below.

- The main gear (5), mounted on the mast, was taken from the water pump drive.
- Turned pieces of reinforcement are welded in a circle onto the gears, they are also axles (C) - 4 pcs.
- Bearings with gears (B) are pressed onto the axle.
- A small gear (A) from the same water pump, mounted on the mast, comes into contact with the gears (B), while at the same time, along the edges of the gears (B), they interact with the teeth of the gearbox housing.
The peculiarity of this gearbox design is that its body rotates around the mast completely freely along with the propeller.
Due to this, the rotation speed of the propeller slows down somewhat, which affects the efficiency of the windmill, but the structure becomes more stable and durable. Even in hurricane winds, the wind generator will not break thanks to the gearbox that controls the propeller speed.
The “stumbling block” can be the gearbox housing (11), what it is made of. The specific bottle-shaped body with teeth in a circle must have suitable dimensions. We got out of the situation by adapting a steel motor housing from an industrial pump; we didn’t even have to cut a thread. The insides of the gearbox have already been designed to fit its dimensions. You can do the same or make the case yourself according to the dimensions.
Important! To make a gear housing, you will need the help of a specialist, so to save money, try to adapt ready-made housings from used engines and pumps. Another difficulty is making the impeller. By the way, the impeller will not be located perpendicular to the earth’s surface, like most industrial wind turbines
- First we made the impeller blades from five-ply plywood. Maybe this material would be suitable if the blades were shorter. But since our design requires a blade length of at least 1.5 meters, and preferably 2 m, the plywood propeller broke with wind gusts of 10-15 m/s.
- Solving the problem of how to make a propeller light and durable, we used scraps of fiberglass sheets that friends gave us. This is a very durable material, but at the same time flexible. To ensure the rigidity of the structure, we had to cut not three rectangular strips, but six and glue them together. And only then connect the strips into an impeller with a length of each wing of 1.6 m. The impeller turned out to be very durable, it even survived a storm with a wind speed of 37 m/s.
- While we were making a fiberglass propeller, the idea came up to make a propeller of a different (orthogonal) type, as shown in the picture below. The base of the structure, made of a lightweight duralumin corner, is crowned with large oval blades made of painted sheet metal. Unfortunately, it was not possible to implement the idea due to lack of time, but you might want to do something similar.

Next, we need a small gear and a shaft (12), onto which it is pressed. We will fix the shaft in special fasteners so that it does not jump out, but at the same time rotates freely. And the last thing we need is a flange to connect the rotating shaft to the generator. We will make the shaft from reinforcing bars welded together.
Some will ask, why such complexity, some kind of rotor with a bunch of gears and gears? In fact, everything is quite justified, since most of the territory of Russia has a very uneven wind load. The wind often changes direction and speed, which negatively affects the mechanism of a standard windmill, which will often break down, and this is unacceptable. The windmill mechanism we propose from a washing machine engine is much more stable and, if performed well, will work for a long time.
We construct a windmill with our own hands
 The design concept was determined, spare parts were selected, and a drawing was made based on them. Now you can start assembling the windmill from the washing machine engine. First, we determine the location of the windmill. The support should be placed in an open, windy place, preferably on a hill. The height of the support should be as high as possible; in our case (as we have already said), we used a 10-meter-high wooden electric pole located on our plot of land, disconnected from communications. Next we do the following.
- We install the mast on a support using special fastenings. During installation we used mounting claws.
- We install the previously assembled gearbox with the impeller on the mast, making sure that it is working.
- We connect the shaft to the main gear (5), located on the mast at the base of the gearbox.
- We fix the shaft in the special fasteners described above.
- We connect the rotating shaft to the generator, which must first be secured to a steel support welded from angles vertically directly opposite the shaft.
- Any support can be made, as long as it securely holds the generator.
To prevent the generator from getting wet by rain and covered with snow, you can build something like a booth or a durable canopy over it. In this case, it will last much longer. So we described in general outline
the process of creating a wind generator from a washing machine engine. Now you can start testing it, we hope it will help you take one more step towards an autonomous power supply for your dacha or private home.
And what can our inventive Kulibins, who have golden hands and a logical mind, come up with! You can successfully use the electric motor of a rusty washing machine and even adapt the parts of an ordinary household fan intended for disposal.
Don't throw away your old screwdriver For example, the battery of a screwdriver has become unusable, but all other parts have become useless. Don't throw away the unit. It is in such cases that craftsmen make wind generators based on household devices, where such is, in in this case
, an ordinary, well-known screwdriver. Look at fig. 1, which shows a cross-section of an ordinary screwdriver. How can you get him to start? new life

from a completely different perspective? For the first part of its service to man, it took electricity to help with construction and repairs, and now it can be adapted to provide electricity using the wind. We disconnect everything unnecessary and remove the rotor part of the unit. Here is the engine shown in Fig. 2. Consider that this is a future windmill-invigorator that will give you free electricity

 We show the entire unit assembled and strengthened without blades. This is what the design of a homemade wind generator looks like, built on the basis of an electric motor from a screwdriver (see Fig. 5). In exactly the same way, you can assemble a wind generator based on an electric motor from a broken drill.

 So, we collected it. Now we need to reliably cover the entire mechanism from precipitation. There is a humorous saying: “The need for invention is cunning.” No wonder I remembered a popular saying that accurately conveys the resourcefulness of the technical mind of our craftsmen. To cover the mechanism of a homemade wind generator, some people used, you won’t believe it, an ordinary coffee can! (see Fig. 6). At the same time, a sealant was used to strengthen the lid and bottom of the jar on both sides, and the jar itself was wrapped with electrical tape.
 The result was this simple design (see Fig. 7). It remains to strengthen 4 blades cut from PVC pipes, and a homemade wind generator based on household devices (drill, screwdriver or washing machine) is ready to work. If you want your homemade wind generator to be more efficient, use a gearbox from a wrench as a basis; it is much more powerful and produces more than 5 kW/hour.
Use electric motors from household devices!
Since we are talking about installing a wind turbine from household devices, it is necessary to note the following nuance. With all these devices, batteries or controllers usually fail, or rust eats away at the body. All other parts, including the electric motor, remain quite suitable for further service to humans. In this case, this unit can successfully operate as a generator.
Look and imagine within the borders of any country how many old washing machines, screwdrivers and drills are lying around in landfills, attics, workshops and garages. At the same time, the free wind walks around like a hooligan, wasting its energy on pranks. Apply ready-made engines to wind forces and you will receive a free electrical energy for the same garages, workshops, and even ensure the operation of the radio and TV. Dare, invent, look for joy in everyday life every hour, every day - find it constantly. And you will find the happiness of a truly pulsating life!
A pensioner made a windmill: